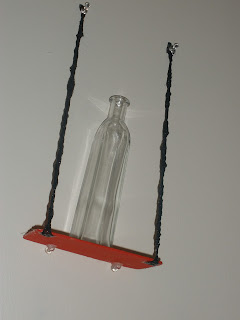
Supplies needed: a vase, small flowers, paint (paint brush), small thin wood block,
2 thumb tacts, fabric, and super glue.
First: Paint the wooden block any color you like.
Second: Glue the thumb tacts onto the wooden block.
Make sure they are spaced evenly like shown above.
Third: Cut strips of fabric (make extra long to adjust later).
Then glue the tips of the fabric onto the bottom part (same side where the thumb tacts are glued).
Fourth: Flip block over and glue vase onto the wooden block.
Make sure the vase is going to be in a spot where it will be close to the wall
once you hang this up.
Fifth: Put the thumb tacts attached to wooden block into the spot where you want the vase to go (Warning: it is a little tricky to do so, so be careful). Then take the fabric and tact it to the wall above the vase (first I cut my fabric to appropriate length and then I twisted my fabric). This is why you wanted extra fabric, just in case the vase needed more support.
Sixth: cut flowers to needed length.
Seventh: put flowers into wall vase.
Finished!


No comments:
Post a Comment